
How to choose the right size for custom cube boxes?
Choosing the wrong box size is a costly mistake. It wastes materials, increases shipping costs, and risks product damage. Let's master the simple steps to select the perfect size.
To choose the right size, measure your product's length, width, and height. Then, add a small buffer, about 1/8 to 1/4 inch, to each dimension. This gives you the ideal internal box dimensions for a secure fit that protects the contents during shipping.
Getting the size right seems simple, but there are details that can make a big difference for your production line and your clients. As someone who has provided machinery to thousands of businesses in the packaging industry since 2003, I've seen how this one detail impacts everything. In this guide, I'll share the key questions we hear most often and give you the practical answers you need. Let's dive into the specifics so you can produce boxes with confidence.
How do I figure out what size box I need?
Unsure which box dimensions to use for a new product? Guessing can lead to costly reorders and project delays, frustrating both you and your clients. Follow this simple measurement process.
Measure your product's longest side (Length), widest side (Width), and tallest side (Height). For irregularly shaped items, use the maximum point for each. Add a buffer for padding. This gives you the necessary internal dimensions for the box you need to manufacture.

Figuring out the right box size is a foundational skill in the packaging business. It is not just about fitting an item; it is about protection, presentation, and production efficiency. I have seen my clients who run printing and converting businesses save thousands of dollars just by refining this one step.
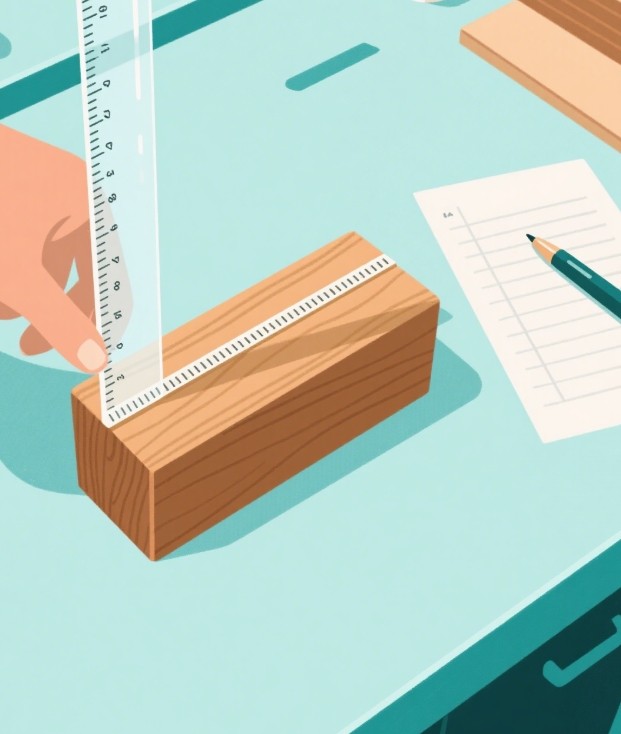
Step 1: Measure the Product Accurately
Always measure the item you are packaging at its three widest points: Length, Width, and Height. Length is the longest side, and width is the shortest side when you look at the top of the item. Height is how tall it stands. You must be precise. Use a good ruler or a caliper for this. For my clients in the bookbinding industry, this is crucial for creating perfect-fit book slipcases, and accuracy is everything.
Step 2: Decide on the Fit
Do you want a snug fit or a loose fit? A snug fit is great for single, sturdy items where presentation is key. A loose fit is necessary when you need to add protective materials like foam or paper. Think about the end-user experience. Will the item be difficult to remove if the fit is too tight? This is a question you should ask your client.
Step 3: Factor in Padding and Inserts
If your client's product needs protection, you must add space for bubble wrap, foam inserts, or paper filler. A common rule is to add 1/4 inch (about 6mm) to each dimension for a light layer of padding. If you are producing boxes for electronics or fragile glassware, you might need custom-designed inserts. You must account for the space these inserts will occupy inside the box. This final number gives you the internal dimensions of the box your machine needs to create. Remember, the thickness of the box material itself will determine the final external dimensions.
What are the dimensions of a 3 cube box?
Confused by industry terms like "3 cube box"? Using the wrong standard can mess up your entire production run and lead to wasted materials. Let's define this term simply.
A "3 cube box," or 3.0 cubic foot box, refers to its total volume, not one specific shape. While a common size is 18" x 18" x 16", other dimensions can exist. Always clarify the exact L x W x H required for your project.

In the broader shipping world, especially in North America, you will often hear about boxes in terms of "cubes." This is a shorthand for cubic feet, which measures the total volume a box can hold. While it is a useful term for logistics, for us in the custom box manufacturing business, it is not precise enough.
Understanding Cubic Feet
The calculation is simple: (Length x Width x Height in inches) / 1728 = Volume in Cubic Feet. So, a box that is 12" x 12" x 12" is exactly 1 cubic foot. A "3 cube box" just holds three times that volume.
Common "Cube" Box Sizes
This shorthand is most common for standard moving and shipping boxes. Here are some typical sizes you might see in the logistics world:
| Box Type | Typical Dimensions (L x W x H) | Volume (Cubic Feet) |
|---|---|---|
| 1.5 Cube Box | 16" x 12" x 12" | 1.5 |
| 3.0 Cube Box | 18" x 18" x 16" | 3.0 |
| 4.5 Cube Box | 18" x 18" x 24" | 4.5 |
| 6.0 Cube Box | 22" x 22" x 22" | 6.1 |
Why Precision Matters More Than Slang
For your clients in cosmetics, electronics, or luxury goods, "about 3 cubic feet" is useless. They need a box that is precisely 18.2cm x 18.2cm x 16.5cm. Our machines at Kylin Machine are built for this precision. When you are setting up a run on a rigid box machine, you input exact millimeters or inches. Relying on general terms can lead to a failed production run and angry clients. Always get the exact internal dimensions.
How does a packer choose the right size box?
Is your client's packing team wasting time trying to find the right box? This inefficiency increases labor costs and filler material expenses, directly impacting their profitability and your relationship with them.
A packer chooses the smallest box that fits the product plus necessary padding. The goal is to minimize empty space. This prevents items from shifting, reduces the amount of void fill needed, and can lower shipping costs calculated by dimensional weight. Efficiency is key.

As a box manufacturer, understanding how your clients' teams will use the boxes is very important. When we design our rigid box machines, we think about the final product and its journey. A packer's choice on the fulfillment line directly impacts costs and customer satisfaction. You can be a better partner by understanding their needs.
The "Two-Inch" Rule
A good general guideline for a packer is the "two-inch rule." This suggests leaving about two inches of space around the item for protective materials. For the premium rigid boxes you produce for luxury goods or electronics, this rule might be adjusted. The key is to help your client establish a simple, clear rule for their packing team to follow. This reduces decision-making time and improves consistency.
Balancing Protection and Cost
The packer's main job is to find a balance. The box must be large enough to protect the contents, but small enough to avoid high shipping costs. Many shipping companies now use dimensional (DIM) weight. They charge based on the box's size, not just its weight. A larger box, even if light, will cost more to ship. By producing well-sized boxes for your clients, you help them manage these logistics costs effectively.
Training for Consistency
The best way to ensure packers choose the right box is through training. Your clients should have a simple chart or guide showing which box to use for which product. When you produce a new custom box size for them, make sure they know what product it is designed for. This simple communication prevents waste and ensures their products arrive safely.
How to calculate the box size?
You have your product's measurements, but a small miscalculation can ruin an entire production run. This is a costly and completely avoidable error. Let's review the simple formula.
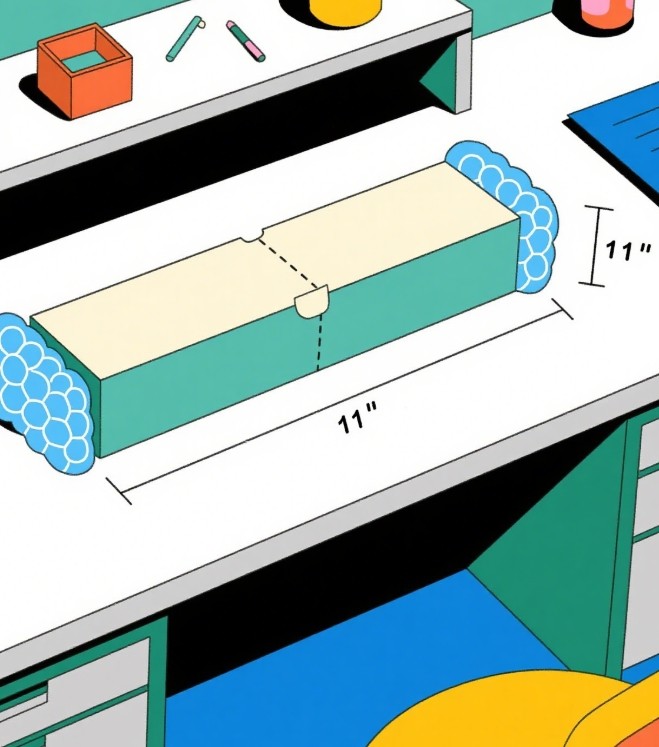
Use this formula for each dimension: Internal Box Size = Product Size + Padding Space. For a 10-inch product needing 0.5 inches of bubble wrap on both sides, your internal box dimension would be 11 inches (10" + 0.5" + 0.5").
Calculation is where precision becomes critical. At Kylin Machine, our equipment is designed to work with exact specifications, down to the millimeter. Getting this calculation right is the difference between a successful project and a pile of waste. You should always think from the inside out.
The Core Formula: Inside-Out
The most important dimensions are the internal ones. This is the usable space inside the box.
- Internal Length = Product Length + (Padding Thickness x 2)
- Internal Width = Product Width + (Padding Thickness x 2)
- Internal Height = Product Height + (Padding Thickness x 2)
You multiply by two because the padding is on both sides of the product, such as front and back, left and right, or top and bottom.
From Internal to External Dimensions
The external dimensions are what a shipping company measures. To find these, you must know the thickness of your material.
- External Dimension = Internal Dimension + (Material Thickness x 2)
For a rigid box made with 2mm board, you would add 4mm to each internal dimension to get the external size. This is vital for pallet stacking and logistics.
A Practical Example
Let's say your client has a hardback book that is 6" (W) x 9" (H) x 1.5" (L). They want a rigid box with no extra padding. The box material is 3mm thick.
- Internal Dimensions: 6" x 9" x 1.5" (since there is no padding). These are the numbers you enter into your machine.
- External Dimensions:
- External Width = 6" + (3mm x 2) = 6" + 6mm ≈ 6.24"
- External Height = 9" + (3mm x 2) = 9" + 6mm ≈ 9.24"
- External Length = 1.5" + (3mm x 2) = 1.5" + 6mm ≈ 1.74"
These external numbers are what your client needs for their shipping software.
Conclusion
In summary, choosing the right box size comes down to precise measurement, accounting for padding, and understanding internal versus external dimensions. Get this right to save money and protect products.
发表回复