
How to cover a cardboard box with fabric?
Tired of plain cardboard boxes? Want an elegant storage solution? Fabric covering is your answer, and using quality methods matters for a great result.
Yes, you can easily cover cardboard boxes with fabric using simple tools and common adhesives. This process transforms basic boxes into stylish, durable storage or attractive gift containers, adding a personal touch to your organization or presents.
Now you know it is possible to transform a simple box. Let's explore the details further. As we go, you'll see how this simple craft shares principles with professional packaging. This might even spark some bigger ideas, especially if you're thinking about packaging on a larger scale.
Can you cover a cardboard box with fabric?
Doubting if covering a box with fabric is truly doable for you? Worried it might be too complex? Covering boxes with fabric is surprisingly simple and very effective.
Absolutely! Covering a cardboard box with fabric is a popular and rewarding DIY project. It’s a fantastic way to upcycle old boxes and customize storage solutions with beautiful, personalized results.
Covering a cardboard box with fabric is not just possible; it's a really enjoyable activity. I remember when I first tried it, I was just looking for a way to make some old shoeboxes look nicer for storing craft supplies. It turned out to be quite easy and the results were impressive.
Why Cover Boxes with Fabric?
There are many good reasons.
- Upcycling: You give new life to old boxes that you might otherwise throw away. This is great for the environment.
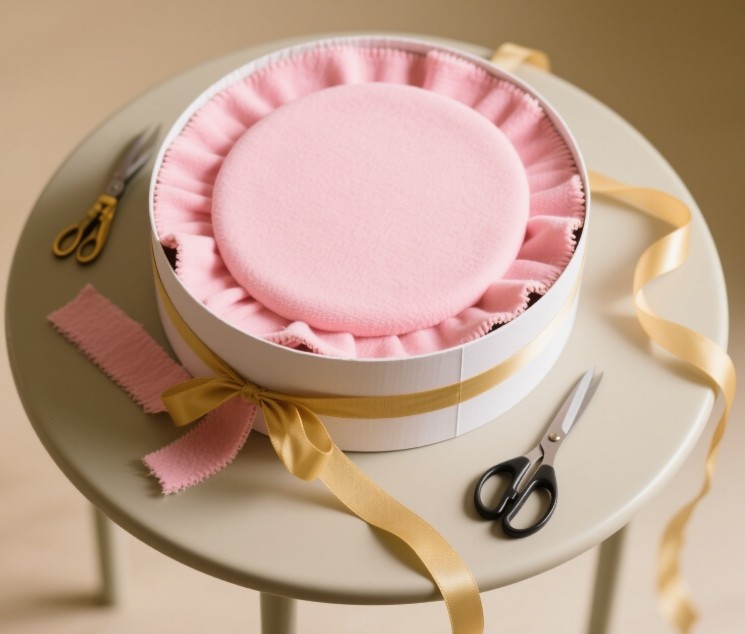
- Customization: You can choose fabrics that match your room decor or the theme of a gift. The possibilities are endless.
- Aesthetics & Durability: Fabric adds a touch of elegance and also makes the box stronger. It feels much nicer than plain cardboard.
Basic Steps for Fabric Covering
The general process is straightforward.
- Measure: You measure your box and the fabric.
- Cut: You cut the fabric to the right size, usually leaving a little extra to fold over.
- Glue: You apply adhesive to the box and carefully smooth the fabric onto it.
From DIY to Professional Production
While you are doing this by hand for one or two boxes, imagine the need to produce thousands of perfectly fabric-covered boxes for luxury products. This is where the scale changes things dramatically. In my work with Kylin Machine, we specialize in equipment that automates these kinds of processes for the packaging industry. For example, our rigid box making machines handle the precise application of wrap materials, including fabric-like textures or specialized papers, to create high-end packaging. The core idea of careful material application and achieving a neat finish is the same, but our machines do it with incredible speed and consistency. Think about industries like Graphic Arts or Paper Converting; they rely on such technology to produce premium packaging efficiently. Our Kylin spotter machines, for instance, ensure perfect alignment when applying these wraps, which is just like how you'd carefully align fabric on your DIY box, but on an industrial scale.
What is the best fabric for covering boxes?
Choosing the right fabric can feel a bit overwhelming. Will it stick properly? Will it look good? The right fabric definitely makes all the difference for your project.
Cotton, linen, and quilting fabrics are generally excellent choices for covering cardboard boxes. They are easy to work with, adhere well with most glues, and come in a vast array of patterns and colors.
Selecting the best fabric is important for both the look and the process. I've seen many different materials used over the years, both in hobby crafts and in professional packaging design.
Key Factors for Fabric Selection
When you choose your fabric, think about these points:
- Weight: Lightweight to medium-weight fabrics are usually easiest to work with. Very heavy fabrics can be bulky at the corners.
- Weave: A tighter weave is often better as it's less likely to fray or let glue seep through.
- Stretch: Fabrics with minimal stretch are easier to manage. Stretchy fabrics can distort patterns and be tricky to apply smoothly.
- Pattern: Consider the scale of the pattern relative to your box size. Also, think if you need to match patterns across different sides of the box.
- Opacity: If your cardboard box has dark printing on it, choose a fabric that is opaque enough so the printing doesn't show through.
Here’s a simple table to compare some common fabric types:
| Fabric Type | Pros | Cons | Best For |
|---|---|---|---|
| Cotton (Quilting) | Easy to cut and glue, huge variety of prints, affordable | Can fray, thinner cottons might show glue | Beginners, small to medium boxes, decorative |
| Linen | Elegant, sophisticated look, durable, good natural texture | Can be pricier, may fray more than cotton | Upscale decorative boxes, rustic style |
| Canvas/Duck | Very durable, provides good structure, hides imperfections | Can be bulky for sharp corners, harder to fold | Storage boxes, heavy-duty applications |
| Brocade/Velvet | Luxurious appearance, rich texture, unique | More difficult to work with, can be expensive | Special gift boxes, high-end luxury items |
| Felt | Easy to cut (no fraying), soft, good for kids' projects | Can look less formal, may pill over time | Children's boxes, novelty items, liners |
In my role at Kylin Machine, guiding customers on material selection is a big part of what we do, though on an industrial scale. Our clients in the bookbinding and luxury packaging sectors often use specialized papers, book cloths, or even thin synthetic leathers. Our post-press machines, like our hard cover makers, are designed to handle a wide range of these materials, ensuring a flawless application every single time. The challenge is often about ensuring perfect adhesion and a smooth finish, regardless of the material's thickness or texture. For example, the tension control systems on our Kylin machines are vital when working with delicate or slightly stretchable cover materials, preventing any wrinkles or tears during the automated wrapping process. This ensures the final product, whether it's a book cover or a rigid box, has that premium quality.
How can I attach fabric to cardboard?
Is your fabric falling off or looking lumpy? Is glue making a mess everywhere? Proper adhesion is absolutely key for a lasting, professional look on your fabric-covered box.
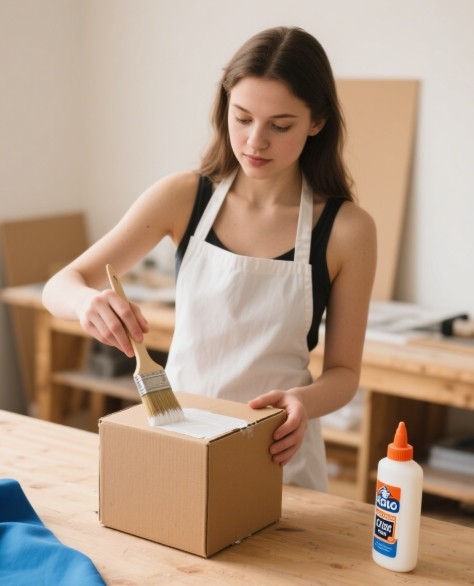
Use strong adhesives like PVA glue (such as white craft glue or Mod Podge), fabric glue, or a good quality spray adhesive. Apply the adhesive evenly to the cardboard, then carefully smooth the fabric onto it to prevent wrinkles and bubbles.
Getting the fabric to stick well is probably the most important step. I've learned that the choice of adhesive and how you apply it makes a huge difference.
Popular Adhesives for Fabric and Cardboard
Let's look at some common options:
PVA Glue (e.g., Elmer's Glue-All, Mod Podge, Tacky Glue)
- Pros: Widely available, strong bond once dry, usually dries clear. Mod Podge can also act as a sealer. Water-based options offer easier cleanup.
- Cons: Can sometimes cause thin cardboard to warp if too much is applied. Drying time can be longer.
- Application Tip: Use a brush or a silicone spreader to apply a thin, even coat. Don't use too much, as it can seep through some fabrics.
Spray Adhesive
- Pros: Provides very even coverage, especially good for larger surfaces. Tacks up quickly.
- Cons: Needs to be used in a well-ventilated area. Overspray can be messy, so protect your work surface. Some are permanent on contact, offering little repositioning time.
- Application Tip: Shake the can well. Hold it the recommended distance from the surface and spray a light, even coat.
Fabric Glue (e.g., Fabri-Tac)
- Pros: Specifically designed for fabrics, often provides a flexible bond. Many dry clear and are quite strong.
- Cons: Can be more expensive than general craft glues. Some have strong odors.
- Application Tip: Follow the product instructions. Some are best applied to the fabric, others to the cardboard.
Hot Glue Gun
- Pros: Very fast bonding, strong hold for certain applications.
- Cons: Can create lumpy surfaces if not applied thinly and quickly. The glue cools fast, leaving little time for repositioning. Risk of burns.
- Application Tip: Best for attaching embellishments, securing corners from the inside, or for quick fixes, rather than covering large flat areas.
The process of adhesion is absolutely critical in industrial packaging. At Kylin Machine, we've dedicated years to perfecting the gluing systems on our equipment, such as our automatic rigid box makers and case makers. Imagine trying to apply adhesive uniformly and precisely across thousands of box wraps or book covers every day. Our machines utilize sophisticated glue roller systems, often with temperature controls for hot-melt glues or viscosity controls for cold PVA glues. This ensures an optimal, consistent film of adhesive is applied every time, suited to various materials from standard paper to more challenging textiles. The goal is identical to your DIY project: a smooth, bubble-free, durable bond. For instance, our fully automatic rigid box lines integrate these gluing units seamlessly, applying a precise layer of hot-jelly glue or cold PVA glue. This prevents issues like excess glue seepage, which can ruin a product's appearance and is very tricky to manage by hand but is essential for high-volume, high-quality automated production.
How to cover a cardboard box with fabric without sewing?
Don't have a sewing machine, or simply don't want to sew? Good news! You can still create beautiful, durable fabric-covered boxes without a single stitch.
Covering a cardboard box with fabric without sewing is entirely achievable using strong adhesives. The key is to apply glue evenly, smooth the fabric carefully, and neatly fold and tuck the edges, much like wrapping a present.
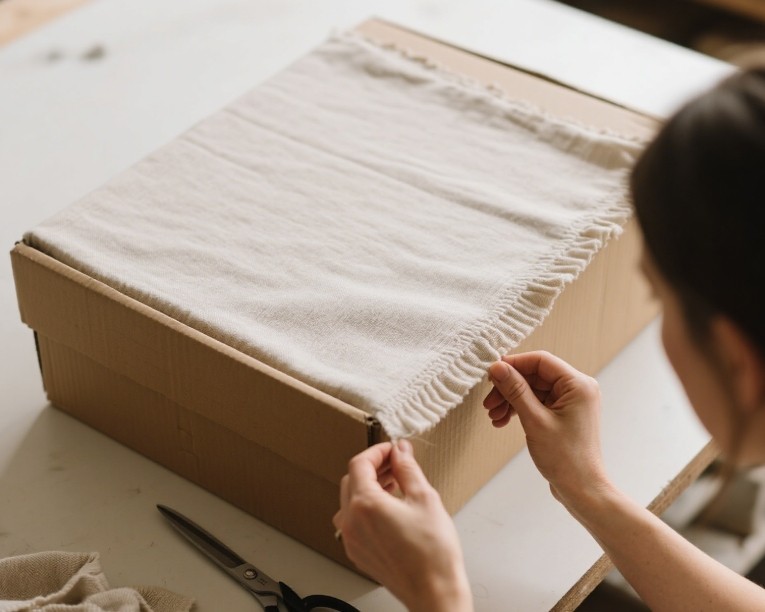
Many people prefer a no-sew method, and it's my go-to for covering boxes too. It's all about smart cutting and gluing. I find it quite relaxing, actually.
Step-by-Step No-Sew Method
Here’s a general guide to get you started:
1. Prepare Your Box and Fabric
- Box: Make sure your cardboard box is clean and sturdy. If it has flaps you don't need, you can cut them off or glue them down.
- Fabric: Iron your fabric to remove all wrinkles. Wrinkles will be very noticeable once glued down.
- Tools: Gather your chosen adhesive (PVA glue, Mod Podge, or spray adhesive are good), sharp scissors or a rotary cutter and mat, a ruler, and a brush or spreader for the glue. A craft knife can be handy for precise cuts.
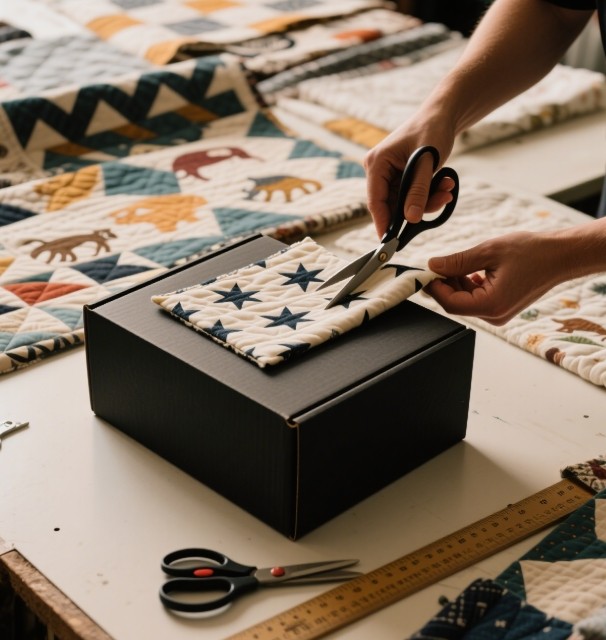
2. Measure and Cut Your Fabric
- Covering the Outside:
- Method 1 (One Piece): If your box is small, you might be able to use one large piece of fabric to wrap around the sides, plus separate pieces for the bottom and inside (if desired). Measure the perimeter of the box and its height. Add about 1-2 inches (2.5-5 cm) to the height for wrapping over the top edge and under the bottom.
- Method 2 (Panels): Cut separate fabric pieces for each side and the bottom. For each piece, add an overlap allowance of about 1 inch (2.5 cm) on all sides that will be wrapped around an edge or will overlap another fabric piece.
- Lining the Inside (Optional): Measure the inside panels and cut fabric pieces to fit, or slightly smaller to avoid bulk in the corners.
3. Apply Adhesive and Fabric to Main Surfaces
- Start with the largest flat areas, like the outside bottom or the main sides.
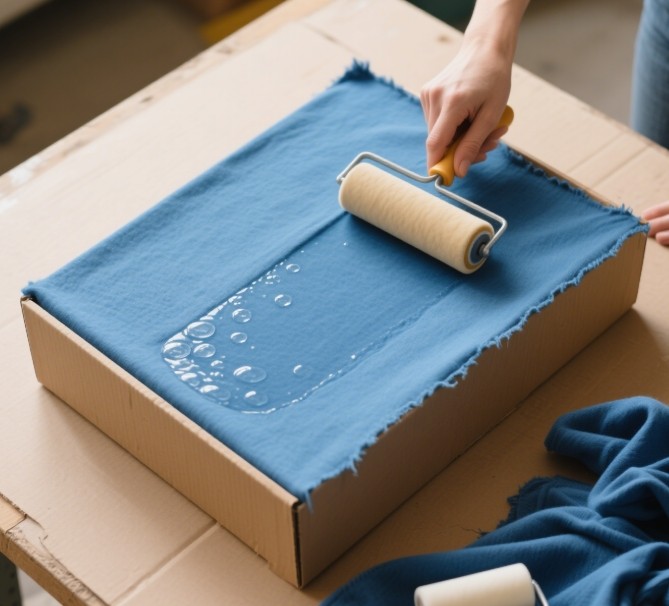
- Apply a thin, even coat of adhesive to one panel of the cardboard box.
- Carefully position your fabric piece onto the glued surface. Start from one edge or the center and smooth it outwards with your hands or a flat tool (like a bone folder or an old credit card) to remove air bubbles and wrinkles.
4. Address Edges and Corners
- Edges: Apply glue to the fabric overlap allowance. Pull it tautly over the edge of the cardboard and press it firmly onto the other side (e.g., wrapping from the outside to the inside lip, or around the bottom edge).
- Corners (Outside): This is where neatness counts.
- Gift-Wrap Style: You can fold the fabric at the corners much like you would when wrapping a gift, creating neat diagonal folds.
- Mitered Corners: For a very clean look, you can cut away excess fabric at the corners. Trim the fabric diagonally at the corner, or cut out a small square/notch where the fabric would bunch up, then fold the flaps down smoothly. This takes a bit of practice.
- Lining (Inside Corners): It’s often easiest to slightly overlap fabric panels in the corners or butt them up against each other.
The no-sew techniques you use – accurate measuring, precise cutting, smooth application of the material, and especially neat corner finishing – are fundamental principles in automated packaging production too. At Kylin Machine, our equipment, like the machines we build for hard book covers (casemakers) and luxury rigid boxes, performs these actions with incredible speed and precision. When you are carefully folding fabric around a corner, imagine our machines using specialized mechanical folding units and pressing tools to create perfectly sharp, clean edges, thousands of times over. That "turning-in" process, where the cover material is wrapped around the board edges, is a critical step our casemaking machines excel at. It’s very similar to what you're doing by hand, but automated for flawless consistency and efficiency. This meticulous, glue-based construction without any sewing is what gives high-end packaging its premium look and feel. This is precisely what our technology helps our B2B customers in the graphic arts and paper converting industries achieve on a massive industrial scale.
Conclusion
Covering cardboard boxes with fabric is a creative and practical skill. For businesses needing high-volume, top-quality packaging, explore Kylin Machine's advanced solutions. I'm Jacob, find us at www.kylinmachines.com.
发表回复